Content Security

Conceptually, we can think of securing published content in three levels:
Each level is developed or administered in a different way. This article provides an overview of how each security level is implemented inside Connect.
Server Level
This level refers to restricting who is able to log into the Connect server. The user will need to possess personal credentials in order to complete the login process. Such process will depend on the authentication mechanism chosen for a given Connect server.
Server roles
Once inside the Connect service, the user will have one of these roles:
Administrator - The user is able to perform server level modifications to the Connect service. A user could be an Connect administrator without necessarily being an administrator at the Operating System level.
Publisher - A person who is allowed to publish content.
Viewer - An account that can access content on a read-only basis.
For more information, see please refer to the administration guide: User Management/User Role.
Application level
This level refers to restricting access to specific assets within Connect. By “assets”, we mean any of the many types of content that we are able to publish to Connect, such as: Shiny apps, R Markdown documents, Plumber REST APIs, plots, etc.

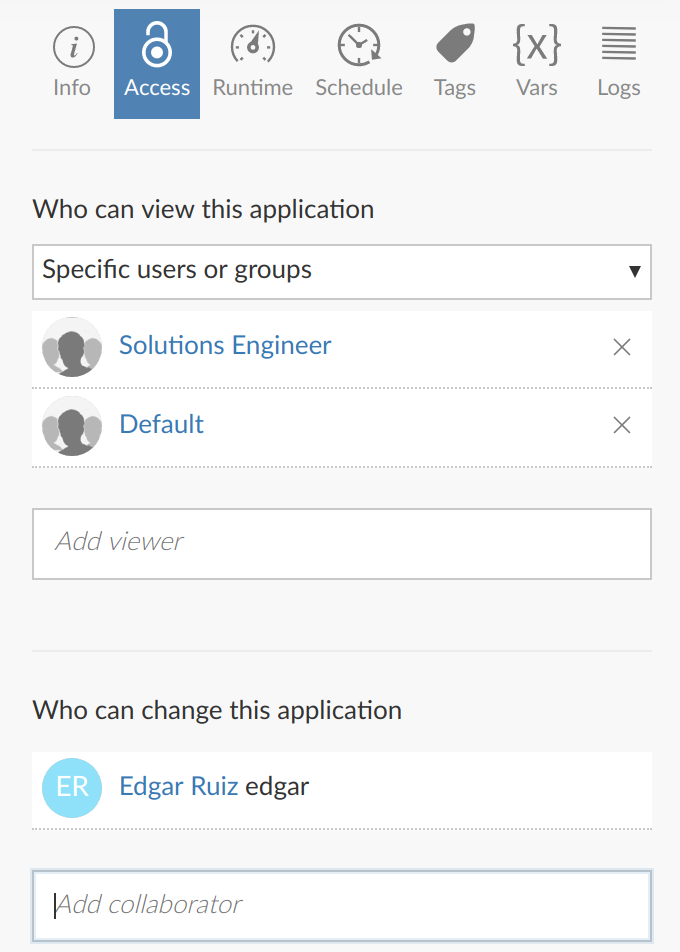
In Connect, there are two roles that can be set at the asset level: Viewer and Collaborator. Viewers are read-only, and collaborators are the fellow developers who can also modify the asset.
Users can be added to either role individually or by group. The ability to add groups to an asset will depend on the which authentication is being used with Connect. The following screenshot shows the how the two roles were setup for a particular app. In this case, the Viewer role is defined by listing groups instead of individual users:
The recommendation is to allow access to user groups, as opposed to individual users. This enables the user maintenance to be performed centrally, instead of setting it up per-asset in Connect. If the authentication system is managed by an IT or Security team, using their security groups provides an even more centralized user maintenance. Users will be allowed or blocked to IT systems based on on-boarding/off-boarding company policies. In other words, if a user goes from the Accounting department to the Marketing department, access to the corresponding systems and apps will automatically work as expected, because IT moved that user in and out the proper security groups.
Data Level
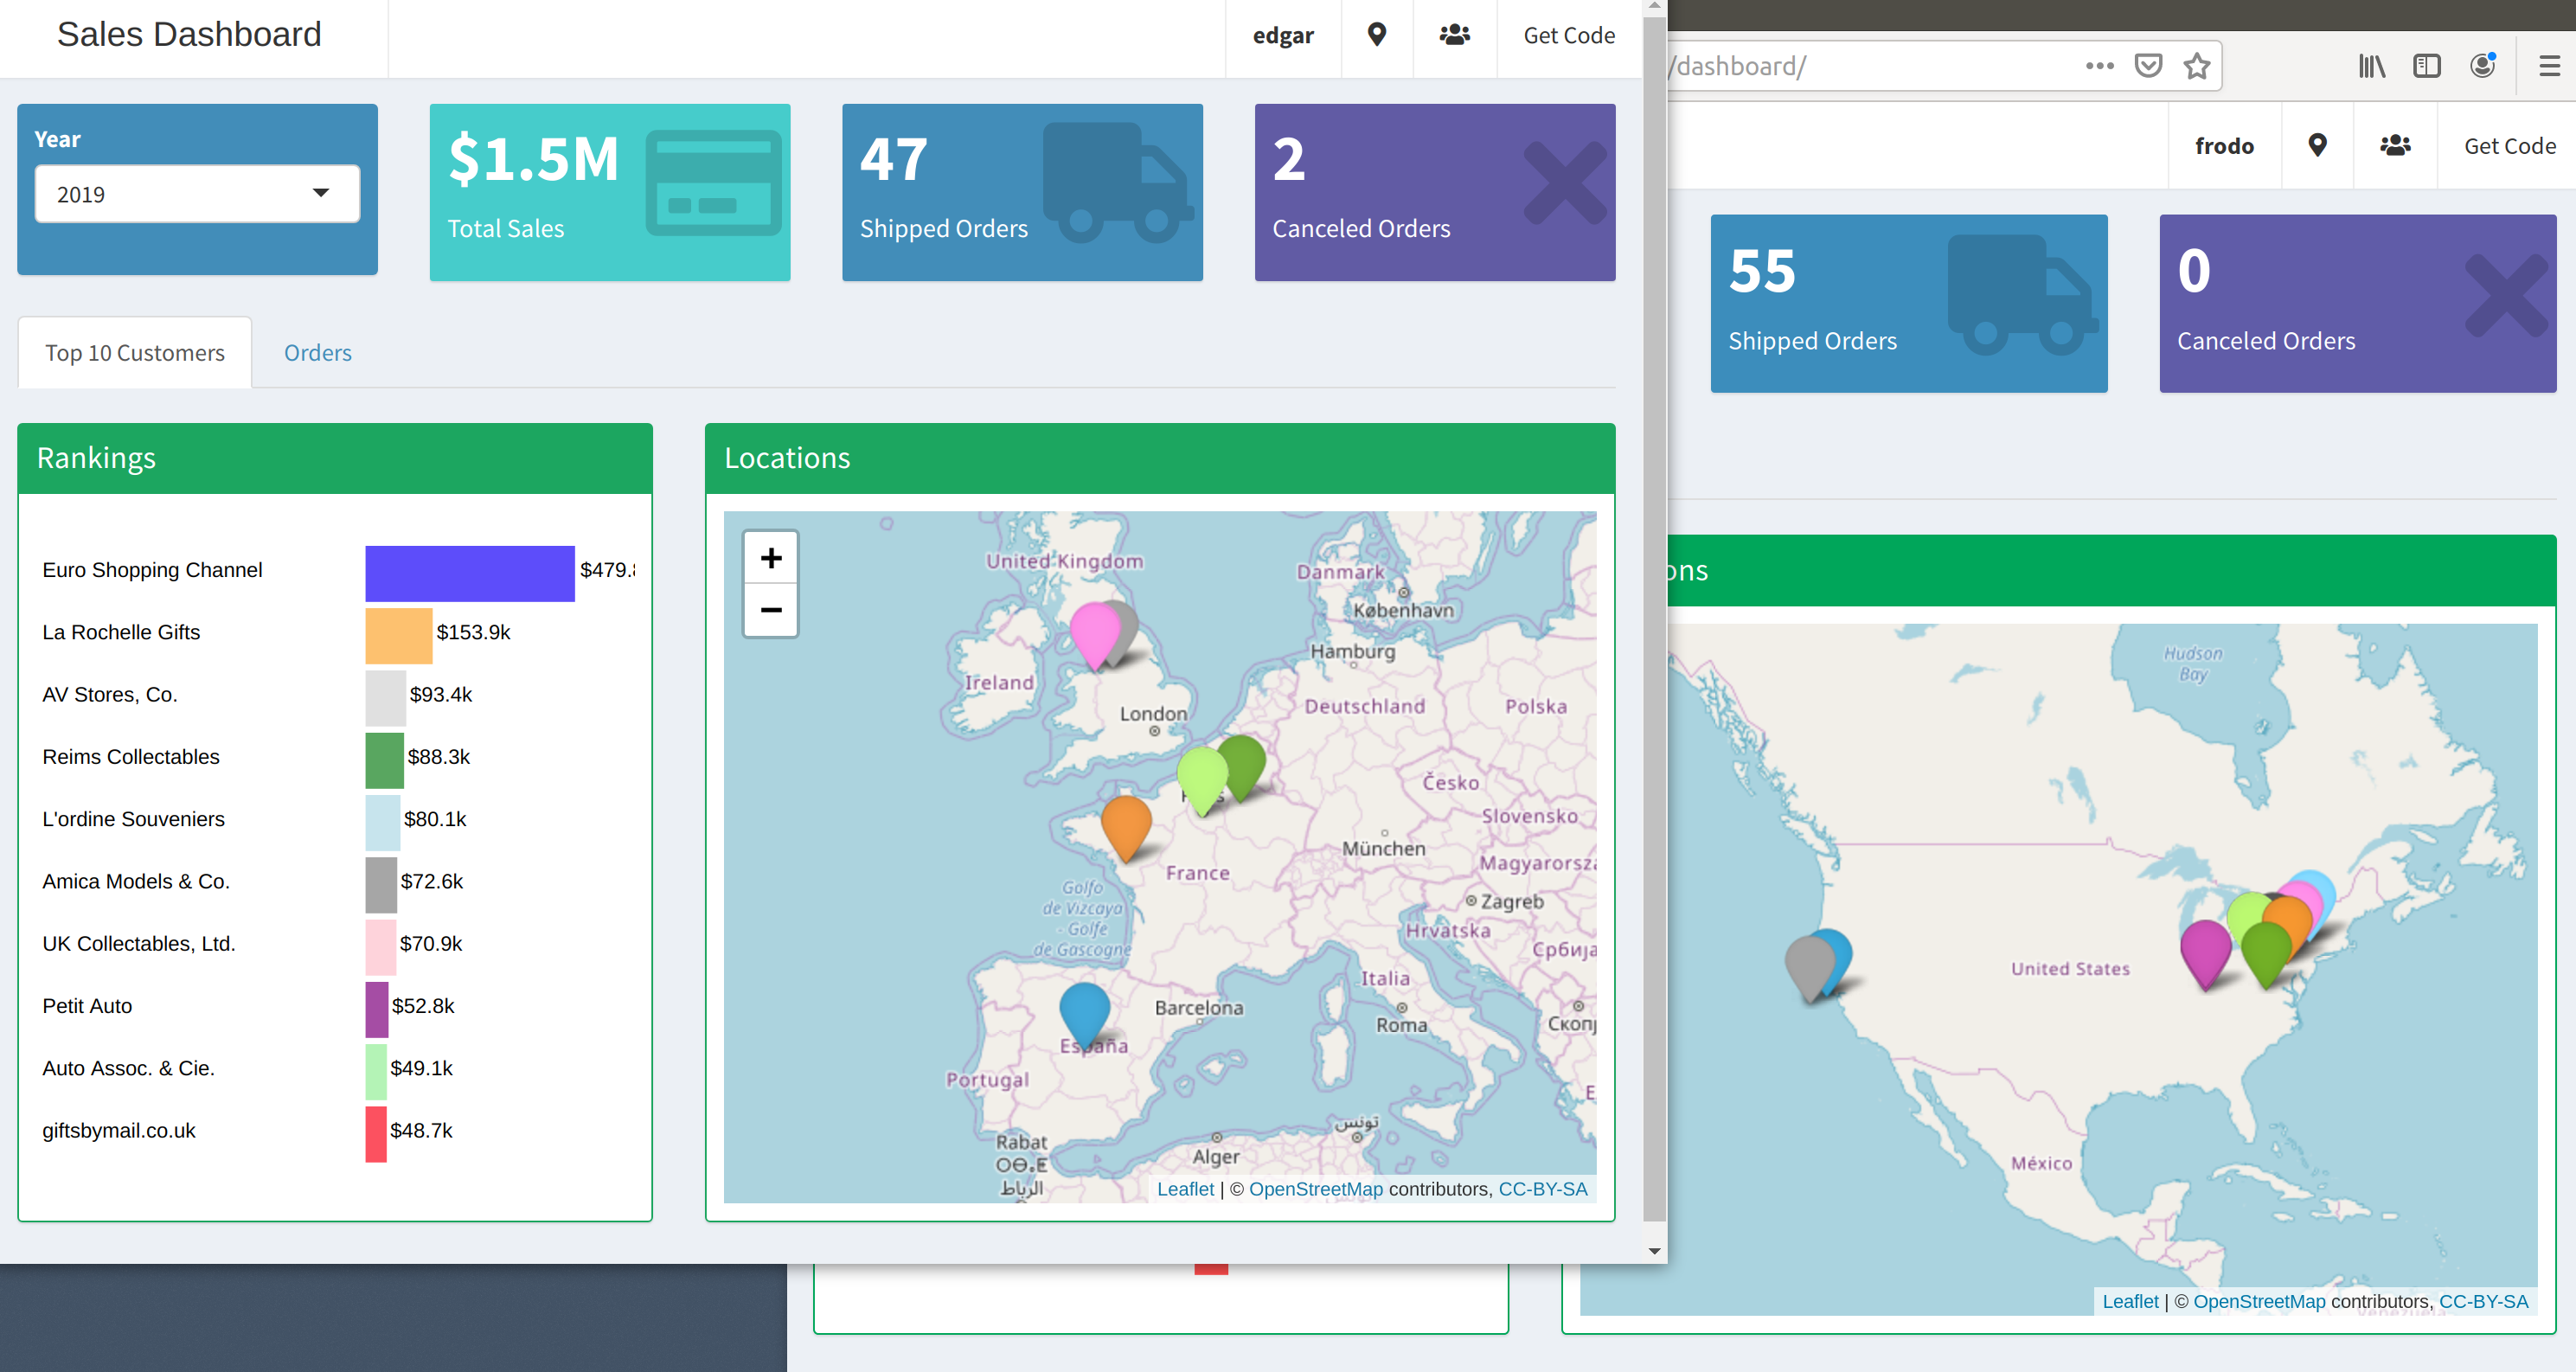
This level refers to restricting the data presented in a given application. For example, even though everyone in the Sales department can access a Shiny dashboard, the Sales team member should only be able to see the customers assigned to that specific team member.
There are two primary approaches to accomplish this kind of security:
Row-level security
Assignment or entitlement list
Row-level security
This kind of security is setup within a database. Access to specific rows, and even columns, of tables are restricted based on the user’s credentials passed down from the upstream application, in our case, a Shiny application. The database administrators setup rules and policies that ensure that only the allowed data is passed back in a query. Implementing this row-level security takes a lot of time and effort, so it is rare to find companies who have it.
If available, row-level security can be accessed via Shiny applications only, and only if Connect is integrated via a Pluggable Authentication Module, or PAM. By setting the application to run as the logged in user, it becomes possible to pass the user’s credentials down to the database. For more information see about setting up this on Connect see: Process Management/Run-as. Once the application is able to pass the user’s credentials to the database, please refer to this article on database best practices: Best Practices/Deployment
Assignment or entitlement list
This approach involves using a list to determine what data should be available for a given user. This is the best option if row-level security is not available. Please, keep in mind that it places the responsibility of executing the data restriction to the developer of the asset.
In a Shiny app, the session variable provides the user name and groups that user belongs to. The information can then be used to match against the assignment list in order to pre-filter the data:
server <- function(input, output, session) {
    user_name <- session$user
    user_groups <- session$groups
}
Here are a few examples of how to use the session variables with Connect:
- A simple example app - Access code here
- A
shinydashboardthat simulates a Sales Dashboard - Access code here. Here is a screenshot of two different users displayed in separate Web Browsers:
Read more about personalized data access in Creating user privileges on Posit Connect.
In plumber APIs, the user information is contained in the header. Please see the User Manual / Plumber.